Building a NuGet Packages Architecture Part 3 - Adding packages to a feed using a pipeline in Azure DevOps
This is part 3 in a series of 6 articles about building a software architecture based on NuGet packages and feeds. In this series you will see:
- How to refactor your codebase to make it work with packages
- How to build packages on your local machine
- How to build packages using an Azure build pipeline and add the generated packages to a feed
- How to consume your packages in your applications
- Different ways to improve usage of your packages and types with service registration methods
- Various tips and tricks to enhance your package and how to use them
You'll find all the articles in the series here:
In the previous article you saw how to create packages from your projects on your local machine. In this article I'll take these concepts a step further and set up a build pipeline in Azure DevOps to automatically build NuGet packages and publish them to a feed so they can be accessed by Visual Studio and other tools.
If you're interested in purchasing the entire article series now as a 60+ page PDF document, check out this post: Introducing a new article series: Building a NuGet packages architecture.
Introduction
Having packages built locally and accessible through a local disk-based feed is nice but it has a few drawbacks. One problem is the manual work required to get the .nupkg files from the build folders to a folder like C:\MyNuGetPackages. It's also hard to share the packages with coworkers. You could make some of this easier by automatically copying the produced files to a shared network folder on build. For example, the following <Target> added to your project's .csproj file will automatically copy the package to C:\MyNuGetPackages after each successful pack operation:
<Target Name="CopyPackage" AfterTargets="Pack">
  <Copy SourceFiles="$(OutputPath)..\$(PackageId).$(PackageVersion).nupkg"
         DestinationFolder="C:\MyNuGetPackages\" />
</Target>
For more information, see the section Target build order of this article: https://docs.microsoft.com/en-us/nuget/reference/msbuild-targets
For small environments this approach may work fine. But there's a much better alternative available: uploading your packages to an external feed which could be entirely public (such as nuget.org) or with access to a limited set of developers only, such as MyGet or a private Azure DevOps feed. Which feed you choose to publish to doesn't matter much when it comes to building the pipeline as they all follow the same principle. In the next section you see how to build your packages using an Azure DevOps pipeline and then how to publish them to an Azure feed.
Auto-building and publishing NuGet packages
In order to get my project built and published to a NuGet feed, I took the following high-level steps:
- Add my code to an online repo. This can be Github, Azure, and a few others. Just like in my article series on building and deploying a .NET Core app, I'll use Github for my source code but you can pick Azure or something else if you want to follow along.
- Set up a build pipeline in Azure DevOps to build the project.
- Include a dotnet pack step in the build process to turn the compiled projects into packages.
- Include a push step in the build process to upload the packages to a private feed.
- Verify the packages have been uploaded to the feed successfully.
In the following sections I'll describe these steps in more details.
Add source code to a remote source repository
As I mentioned, I'll be using GitHub to store my source code. You can choose your own remote repository in which case the steps below will be different.
- With the solution loaded in Visual Studio, remove the web project from the solution, leaving only the projects that will become packages. In part 4 of this series, I'll reinstate the web project and add the necessary references back as packages.
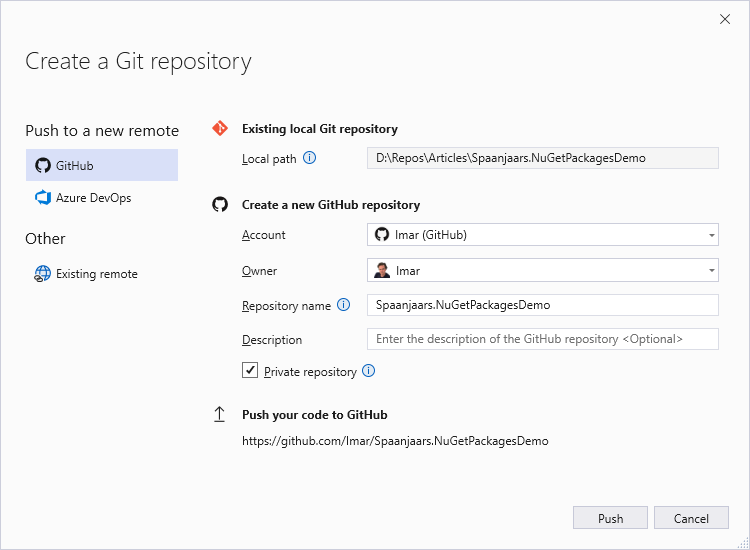
- Choose Git | Create Git repository. If you had already created a Git repo locally, choose Git | Push to Git service instead. In both cases you get a screen like this:
![The Create a Git repository screen in Visual Studui]()
- Select your remote system, provide credentials and other details and then click Create and push or just Push.
- After a short while, the repository has been created and your code has been uploaded to Git.
Setup a build pipeline to build the project
With the code in Git, I can now set up the build pipeline in Azure DevOps.
- Log in to your Azure DevOps environment, and open the Pipelines menu.
- In the top-right, click New pipeline:
![The top of the Pipelines page in Azure DevOps wityh the New pipeline button]()
- Under Where is your code, click GitHub (yaml) or choose your own remote system.
- If needed, authorize Azure DevOps to access your repo.
- Under Select a repository, choose the repo created in the previous section. You'll be taken to GitHub again to approve Azure Pipelines to be installed in your selected repositories. Clicking Approve and install takes you back to Azure.
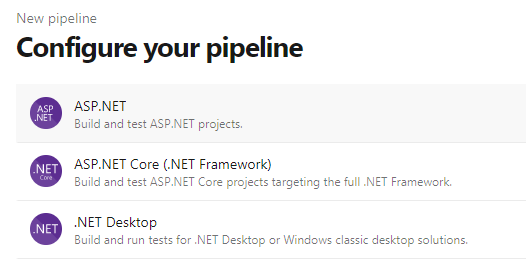
- Under Configure your pipeline, choose ASP.NET Core:
![The New Pipeline dialog in Azure DevOps showing the ASP.NET pipeline types]()
This gives you the following yaml for the pipeline:
# ASP.NET # Build and test ASP.NET projects. # Add steps that publish symbols, save build artifacts, deploy, and more: # https://docs.microsoft.com/azure/devops/pipelines/apps/aspnet/build-aspnet-4 trigger: - master pool: vmImage: 'windows-latest' variables: solution: '**/*.sln' buildPlatform: 'Any CPU' buildConfiguration: 'Release' steps: - task: NuGetToolInstaller@1 - task: NuGetCommand@2 inputs: restoreSolution: '$(solution)' - task: VSBuild@1 inputs: solution: '$(solution)' msbuildArgs: '/p:DeployOnBuild=true /p:WebPublishMethod=Package /p:PackageAsSingleFile=true /p:SkipInvalidConfigurations=true /p:PackageLocation="$(build.artifactStagingDirectory)"' platform: '$(buildPlatform)' configuration: '$(buildConfiguration)' - task: VSTest@2 inputs: platform: '$(buildPlatform)' configuration: '$(buildConfiguration)' - I updated the code that references the solution to build to this to avoid building the starter files in the Before folder and the sample web project (added later):
solution: 'After/**/*.sln'
- If you click Save and run now, the pipeline kicks off. However, if your solution contains one or more projects targeting .NET 6, you may get an error like the following:
The current .NET SDK does not support targeting .NET 6.0. Either target .NET 5.0 or lower, or use a version of the .NET SDK that supports .NET 6.0.
There are a few ways to solve this:- Tell the build pipeline to install .NET 6 prior to building the code by modifying the yaml as follows:
steps: - task: UseDotNet@2 displayName: Use .NET 6.0 inputs: packageType: 'sdk' version: '6.0.x' - Tell the build pipeline to use Windows 2022 which has .NET 6 already installed:
Apparently, windows-latest isn't the latest (yet), causing some issues. More details can be found here: https://github.com/dotnet/core/issues/6907pool: vmImage: 'windows-2022'
I usually pick the second solution as using a VM that already has the required SDKs installed will make your build a little faster.
- Tell the build pipeline to install .NET 6 prior to building the code by modifying the yaml as follows:
- Click Save and run. This will start the build pipeline. After a while you should get a confirmation that the build succeeded. You may get an error from VS Test not being able to find any tests but that's fine. In a later article I'll add unit tests to the solution and run them every time code is committed.

Include a dotnet pack step to build the packages
The next step is to package the projects into NuGet packages. Follow these steps to modify the build pipeline accordingly.
- Open the pipeline in Azure DevOps and scroll to the end of the yaml code.
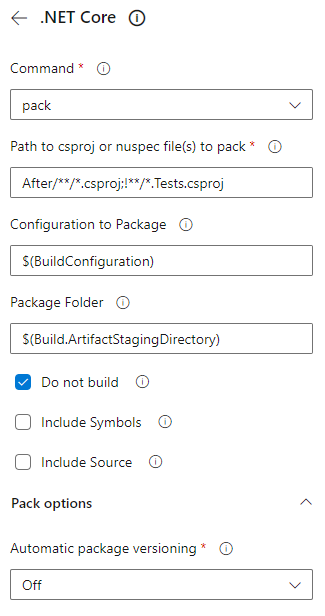
- On the panel on the right, click the .NET Core task, and configure it as follows:
![The dotnet pack task in DevOps]()
I changed the path to exclude my test projects that I'll add later. I also ticked Do not build as I already have a separate build task. - Save the pipeline to store the yaml back in source control and kick it off.
Note that I left Automatic package versioning set to off. That way, the pipeline doesn't generate unique version numbers and you're required to set them yourself in your projects. I like that better as it gives me more control. I'll explain why this is further a little later in this article when discussing versioning.
Publish the packages to a feed using push
This section outlines the steps to create a feed in Azure DevOps and then shows how to update the pipeline to publish the packages to that feed on every build.
- Start by creating a feed. To do that, in Azure DevOps click Artifacts in the main menu. Then in the toolbar click Create feed. Provide a name such as MyDemoFeed and configure the feed's visibility. Untick the box for Include packages from common public sources. That option adds feeds referenced by your project to this feed which I find a bit messy and typically unnecessary. Click Create to create the feed. For more information about the differences between organization-scoped and project-scoped feeds, check out this document: https://docs.microsoft.com/en-us/azure/devops/artifacts/feeds/project-scoped-feeds For more information about the Artifacts feature in Azure DevOps in general, take a look here: https://docs.microsoft.com/en-us/azure/devops/artifacts/.
- Next, open the build pipeline, and scroll to the end of the yaml file.
- On the panel on the right, search for the NuGet task and configure it as follows, selecting Push as the command and your newly created feed as the target feed:
![The dotnet push task in Azure DevOps]()
- Save the pipeline to kick it off. This will once again build your projects and then build packages from them. The last step then uploads these packages to your new feed.
On the settings for the Push task, there's a checkbox labelled Allow duplicates to be skipped. It's important to make sure this checkbox is on when you don't use Automatic package versioning in your dotnet pack command as shown earlier. Your solution is likely to contain multiple packages. if you update one of them and increase its version number, DevOps will still attempt to push the others. Since they will have the same version number, they will be rejected. With the Allow duplicates option, the packages are still rejected but that won't fail the pipeline. The only downside of this setting is that you update a package's code but forget to update its version number, it won't be pushed and you won't be notified of that. But I guess you'll find out soon enough anyway if the package doesn't show up on your feed.
Verify the packages have been published correctly
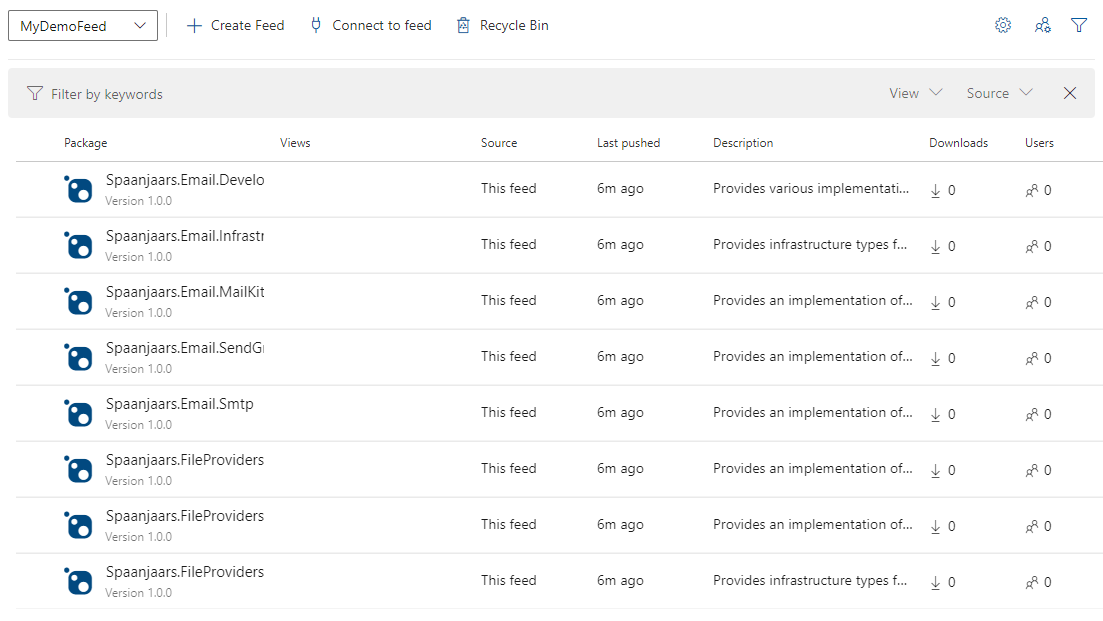
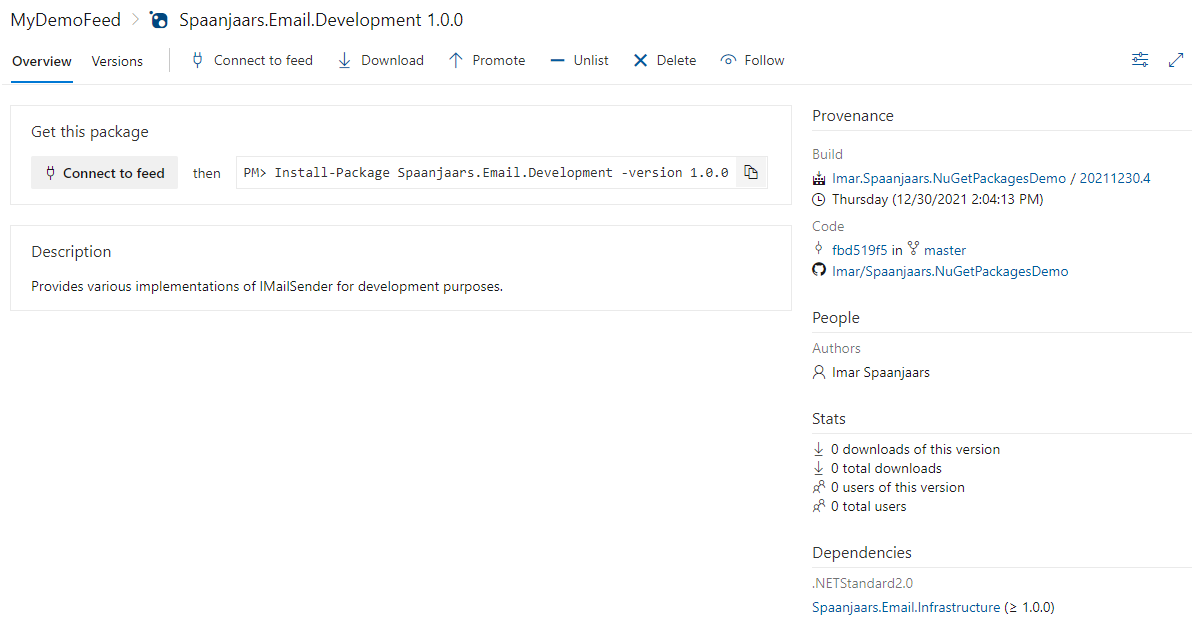
To verify the packages have been created successfully in the previous step, click Artifacts in the main DevOps menu. Ensure that in the top-left, your newly created feed is selected. Your packages now appear in the feed list. Yay! Here's how it looks for my feed:
You can view the details of a package by clicking its name. You'll see info like the NuGet install command, information about the build and source code, dependencies, version history and more:
Note: even though the package shows up on your feed here, it may not be available in Visual Studio's NuGet Package Manager yet when installing it. When you've pushed a package, it can sometimes take a while for the package to show up. When that happens, just wait a bit longer. Alternatively, you can clear your local NuGet cache in Visual Studio by choosing Tools | Options | NuGet Package Manager and then clicking the Clear All NuGet Cache(s) button. More info can be found here: https://stackoverflow.com/questions/54738695/package-is-not-found-in-the-following-primary-source.
On the package details page, you have a number of commands available (most of which are also accessible for each package on the list page through the context or ellipsis menu):
Connect to feed – provides help on getting access to your feed in a variety of environments such as the dotnet command, nuget.exe, Visual Studio and a lot more.
Download – allows you to download the package as a .nupkg file. As explained earlier, .nupkg files are just zip files so you can analyze the package's content with any ZIP file viewer.
Promote – Using the Promote button you can promote (but not demote) a package to a specific feed view. By default, packages are created in the @local view but you can move your packages to the @prerelease or @release views (or to any custom views you create). These views can then be used to communicate the various quality levels of your packages to the developers using them. This way, a package in the prerelease or release views can communicate a higher level of quality than a view below it, making it easier for developers to determine which packages they should choose.
Unlist / Relist – Unlisting a package hides the package in the feed. This means the package won't show up in search results or in the feed's list view like the one in Visual Studio. However, it can still be installed if you know its ID. Relist makes the package visible again. For more information, see the NuGet tab on this page: https://docs.microsoft.com/en-us/azure/devops/artifacts/how-to/delete-and-recover-packages
Delete – Deletes the package. Use with care as it will impact solutions that depend on the package. For more information, check out the documentation: https://docs.microsoft.com/en-us/azure/devops/artifacts/how-to/delete-and-recover-packages.
With the first packages published, it's time to update some of them so they take a dependency on another package instead of on a project reference directly. For example, the packages Spaanjaars.FileProviders.Azure and Spaanjaars.FileProviders.FileSystem should depend on the package Spaanjaars.FileProviders.Infrastructure and not on the project. But before I show you how to that, I need to talk about package versioning first.
Managing versions
Every package in a NuGet feed has a unique ID. For example, the ID Spaanjaars.FileProviders.FileSystem uniquely references a package. However, that package can consist of multiple versions which allows consuming applications to use one version and not be affected by later changes unless you explicitly upgrade to that latest version. Also, with versioning, you have a nice way to communicate that there are updates which can then easily be installed by tools like the Package Manager in Visual Studio. In general, when assigning version numbers, it's recommended to use semantic versioning (https://symver.org/) which gives meaning to your version numbers. Full details can be found on the symver link, but in general:
- You use a major version (i.e. the 1 in version 1.5.2) for major new versions that typically include breaking changes.
- You use a minor version (i.e. the 5 in version 1.5.2) for minor changes such as new functionality without breaking backwards compatibility.
- You use a patch version (i.e. the 2 in 1.5.2) for bug fixes and other changes to existing functionality.
So for example, when the package Spaanjaars.FileProviders.FileSystem was created, it started out with version 1.0.0. After a couple of bug fixes, the version could be at 1.0.7. Then when new support for filtering gets added, the minor version is changed to 1 and the patch version is reset, leading to version 1.1.0. Add a few more bug fixes and the version could be 1.1.4. Finally, when rewriting the API or changing how the file provider is configured could lead to breaking changes and therefore the major version number would be changed to 2.0.0.
To assign a package to a version you have a few options, including:
- Setting them in your .csproj file
- Setting them at build time in the pipeline
Setting them in the build pipeline is pretty straightforward. When you add the pack task (described earlier in this article), you can set how you want automatic versioning handled under Pack options:
The Automatic package versioning dropdown offers the following choices:
Off – No automatic versioning takes place.
Use the date and time – This creates a version number in the format X.Y.Z-ci-datetime where you choose X, Y, and Z. You can set these numbers in the pipeline directly or pull them from variables.
Use an environment variable – This creates a version number from an environment variable that you then need to set yourself somehow.
Use the build number – This option uses the version number of the build to version your packages.
These options are easy to set but have a big drawback: they apply to all packages in the pipeline. Handy if you want to publish a single, large package but not so much when publishing a bunch of your own internal packages as you would have to set up multiple build pipelines or handle the versioning somehow yourself.
I find it a lot easier to set the version numbers directly in the .csproj file. That gives me a few benefits:
- I can set the version for each package individually.
- I can change the version number according to my code changes. So, when I just make a bug fix, I only change the patch number. When I introduce breaking changes, I can set the major number.
Setting the version number in the .csproj is done with the Version element like so:
<PropertyGroup>
  <TargetFramework>netstandard2.0</TargetFramework>
  <PackageId>Spaanjaars.FileProviders.Azure</PackageId>
  <AssemblyVersion>1.0.0.0</AssemblyVersion>
  <Version>1.0.0</Version>
  ...
</PropertyGroup>
Note that the example above also has an AssemblyVersion. This defines the version number of the assembly produced by the project and is independent of the package version. So, the two can be the same, but certainly don't have to be. Often though, for internal packages, it's convenient to make them the same as you have thing less to worry about. If you want them to be the same, you could set the AssemblyVersion and then reference that value in the Version element like so:
<Version>$(AssemblyVersion)</Version>
With versioning covered, the last topic I want to address in this article is managing internal dependencies.
Managing internal dependencies
As I mentioned earlier, it would be good to update the projects in my solution that depend on other projects and change the dependency to be a package dependency rather than a project dependency. This is a common practice for all projects that have a dependency on another project in the same (or other) solution.
When you're building out your package infrastructure the first time, you'll run into a chicken and egg issue. The project with the lowest dependencies (such as the Infrastructure projects in my sample solution) don't exist as a package yet, and thus you can't add a package reference to them. To work around that, your workflow will usually look like this:
- Add all projects to your solution.
- Where needed, create a project reference between the various dependent projects.
- Publish all your projects as packages. This makes the lower dependencies available as packages.
- Update the higher-level dependencies to depend on a package instead of the project. Then republish these with a new version number.
In the next section, I'll show you how I did this for the various packages in my sample solution. I already pushed the packages to a feed earlier in this article, so I am ready for step 4. However, there's one thing I need to do first and that is to configure my feed in Visual Studio.
Configure feed in Visual Studio
Adding the feed to Visual Studio so you can access its packages is done as follows:
- In Azure DevOps, click Artifacts and select the feed you created. Click Connect to feed and then click the Visual Studio item. Here you find instructions on how to add the feed as well as the feed's URL.
- Follow the instructions by adding the feed to Visual Studio under Tools | Options | NuGet Package Manager.
- To verify the feed was added correctly, open any project in Visual Studio, right-click the project in the Solution Explorer and choose Manage NuGet packages. Then in the top-right ensure your feed has been added. Then click the Browse tab. Your packages should now show up.
With the feed added, I could then change my projects.
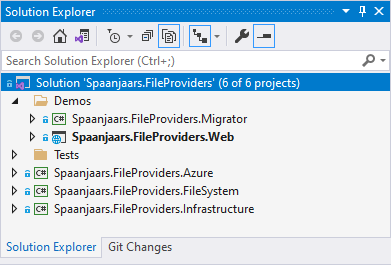
- With the solution open in Visual Studio, expand the dependencies for the project Spaanjaars.Email.Development and under the Projects node, delete the link to Spaanjaars.Email.Infrastructure:
![The demo projec in Visual Studio shwoing the Infrastructure link under Projects]()
This will cause build errors but that's alright as I'll be adding the reference back in next. - Right-click the Spaanjaars.Email.Development project and choose Manage NuGet packages.
- In the top-right corner of the package manager, ensure that your custom feed is selected.
- Click the Browse tab and find the Spaanjaars.Email.Infrastructure package.
- Select the package and click Install.
- Once installed, rebuild the project and ensure everything works again.
When building the initial packages, the pack command has been smart enough to detect the dependencies and already created a package reference between these two projects in the feed. So, from a dependency point of view, not much has changed. However, in Visual Studio the dependencies are now managed through NuGet. In order to reflect that change and have the package rebuilt and published, you need to update the version number and commit your changes. In my case, I changed the version number of 1.0.1 as users of my package should be able to upgrade to this version without issues.
<AssemblyVersion>1.0.1.0</AssemblyVersion>
<Version>$(AssemblyVersion)</Version>
- If you commit your code to Git at this point to trigger a new build, it will fail with the following error:
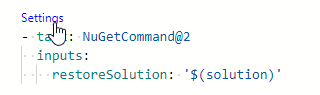
You get this error because NuGet doesn't know where to get the dependent project Spaanjaars.Email.Infrastructure from. It exists on your custom feed, but the pipeline doesn't know that. You need to update the restore command to consider your custom feed as well. To do that, click Settings in the yaml file for the restore command:![An error in the pipeline stating that Spaanjaars.Email.Infrastructure could not be found.]()
Then in the panel on the right, select your feed and click Add to overwrite the existing yaml.![The yaml for the restore command]()
![The dotnet restore command in the pipeline]()
Finally, save your changes to store the yaml and trigger the build. It should now complete successfully. - I repeated this for the other three mail projects (MailKit, SendGrid and Smtp). I also updated the two file providers (Azure and FileSystem) to depend on the Infrastructure project.
- Once I checked in my code and synced, the packages were rebuilt and I ended up with a feed that looked like this:
![A list of packages in my custom feed]()


Great! At this point, I am all set. I converted my projects to NuGet packages. I then published the packages to my custom feed in Azure DevOps (although I could just as easily have published them somewhere else like NuGet or MyGet) and updated my solution to use these new package references where appropriate. This means I have now created a nice foundation of reusable packages that I can then start consuming in my software projects. In the next article in this series, I'll update the sample application by removing all project references and adding them back as package references.
Summary
In this article you saw how to set up an automated build pipeline to build and publish your packages whenever code is changed. I also talked about managing versions of your packages and how to reference packages from one to another.
With the feed updated with the latest versions of my packages, the next step is to update my demo application by removing all project references and the projects' code and then replacing that with package references. This is the topic of the next article in this series.
Source code
You find the full source code for these articles in the following Github repository: https://github.com/Imar/Articles.NuGetPackagesDemo.
Where to Next?
Wonder where to go next? You can read existing comments below or you can post a comment yourself on this article.
Links in this Document
| Doc ID | 630 |
| Full URL | https://imar.spaanjaars.com/630/building-a-nuget-packages-architecture-part-3-adding-packages-to-a-feed-using-a-pipeline-in-azure-devops |
| Short cut | https://imar.spaanjaars.com/630/ |
| Written by | Imar Spaanjaars |
| Date Posted | 02/17/2022 10:02 |
Talk Back! Comment on Imar.Spaanjaars.Com
I am interested in what you have to say about this article. Feel free to post any comments, remarks or questions you may have about this article. The Talk Back feature is not meant for technical questions that are not directly related to this article. So, a post like "Hey, can you tell me how I can upload files to a MySQL database in PHP?" is likely to be removed. Also spam and unrealistic job offers will be deleted immediately.
When you post a comment, you have to provide your name and the comment. Your e-mail address is optional and you only need to provide it if you want me to contact you. It will not be displayed along with your comment. I got sick and tired of the comment spam I was receiving, so I have protected this page with a simple calculation exercise. This means that if you want to leave a comment, you'll need to complete the calculation before you hit the Post Comment button.
If you want to object to a comment made by another visitor, be sure to contact me and I'll look into it ASAP. Don't forget to mention the page link, or the Doc ID of the document.