Building and auto-deploying an ASP.NET Core application - Part 7 - Improving your build and release processes
This is the last part in a series of 7 articles showing you how to build a database-driven ASP.NET Core 5.0 app and deploy it to a remote web server using continuous integration and deployment with GitHub and Azure DevOps. In this final part I'll touch on two improvements you can make to the process you've seen in the earlier articles. In particular, I'll show you how to set up your own build agent to build your software on a custom server rather than on a standard Azure DevOps agent to speed up the build process. I'll also show you how you can minimize downtime when deploying your site to a Microsoft Azure App Service by using deployment slots. This article closes with a quick summary of all I've discussed in this series of articles.
If you haven't read the earlier parts in this series yet, you're encouraged to do that now. Here's the full list of the articles in the series:
- Introduction
- Creating the web application
- Using GitHub and managing change in your application
- Setting up a CI Pipeline in Azure DevOps
- Setting up a CD pipeline: Deploying with web deploy to a Virtual Machine or on-premises server
- Setting up a CD pipeline: Deploying to an Azure App Service
- Improving your builds with a custom build agent and Azure Deployment Slots (you're reading it now)
Setting up a custom build agent
In part 4 of this series I showed you how to create a simple YAML based pipeline to build your software. By pointing the agent pool to vmImage: 'windows-latest' you end up a with a build agent from Azure DevOps. The build agent is the server / process that performs the actual build. In order to create a build, the agent has to perform a number of steps including:
- Get the latest code from source control
- Restore NuGet packages
- Build the software
- Package the build artifacts to make them available for the release process
Since a default build agent is a newly created machine every time you create a build, you have to download all source code and all NuGet packages every time the build runs. On larger systems this can take up quite a lot of time, slowing down your build processes considerably.
Fortunately, it's fairly easy to set up a build agent on one of your own machines and connect it to DevOps. You can then select that build agent as the machine to use for your builds. On your local machine source code and NuGet packages will be preserved between builds, leading to much shorter build times. In the next sections you see how to set up a build agent on one of your own machines and how to connect it to DevOps and use it for your builds.
Note: in part 5 of this series I showed you how to install a release agent on your own machine to deploy your site to IIS. Under the covers, the agent software is the same for a build and a release agent. However, you can't have a single installation handle both responsibilities so you'll have to install them side by side in separate folders. You can do this by creating another sub folder under your agents folder, extract the agent and then run config.cmd from there. The PowerShell script you get from the portal contains some instructions on acquiring and unzipping the agent software and then running config.cmd with a bunch of parameters. By unzipping yourself in a folder of your choosing and then calling config.cmd with the right parameters, you can control where your agents are located and which features they support. Run config.cmd --help for help on the parameters that it accepts and a whole bunch of very useful sample commands. For more information on side by side installation, go here: https://github.com/Microsoft/azure-pipelines-agent/issues/1346 and more information on pipeline agents in general can be found here: https://docs.microsoft.com/en-us/azure/devops/pipelines/agents/agents.
Setting up the build agent
To install the build service on your own machine you need to run a PowerShell script on that machine. That script will then ask you for authentication information which you can handle using a PAT - a Personal Access Token. You need this token only during the installation of the service so you can create a short-lived token. In the next section you see how to acquire the PAT and the installation script and how to install and configure the service on your machine.
- Start by logging in to your Azure DevOps account
- In the top-right corner click the User Settings icon and choose Personal access tokens
![]()
Click New token and fill in the details such as a name for the token, your organization and an expiry date. You want a short expiry date as you need the token only during the installation phase of the agent. Make sure Custom defined is selected under Scopes, click Show all scopes at the bottom and then in the Agent pools group select Read & manage. Click Create. Copy the generated Personal Access Token to the clipboard and then store it somewhere safe. DevOps won't show you the token anymore afterwards.
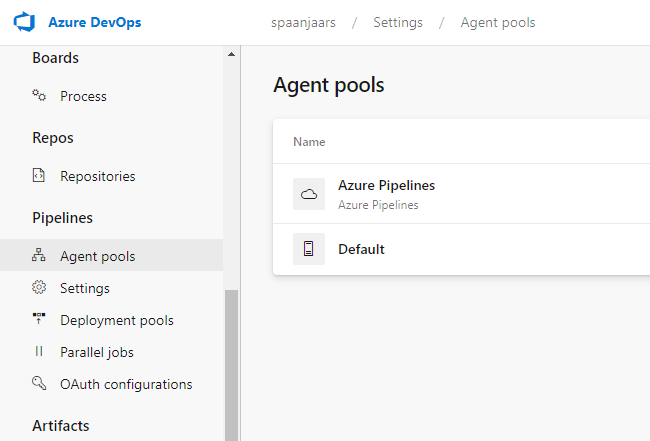
- Next, on the home page of your DevOps environment (at https://dev.azure.com/yourorganization), click Organization settings in the bottom left and then Agent pools in the menu that has appeared:
![]()
The Azure Pipelines pool is the default pool that contains the Azure hosted agents, and Default is the standard location to add your own agents. Go ahead and click Default to open it. If you want to create an entirely new pool, click Add pool in the top-right corner, enter the details and then open that pool.
- In the top-right corner, click New agent. That brings up the following screen:
On this screen you can select the OS for the target agent (Windows, macOS and Linux). I am sticking with Windows in my walkthrough. For a Windows based agent you can choose between a 64-bits and 32-bits OS; in most cases this will be a 64-bits version nowadays. If you're on the machine where you want to install the agent you can click Download to download a ZIP file with the agent software. If you want to install the agent service on a different machine, click the copy icon next to the Download button to copy the URL and then browse to that URL on the target machine to download the ZIP file. Either way, you should end up with a file like vsts-agent-win-x64-2.179.0.zip in your Downloads folder, although your OS and version info in the file name may differ. You should keep the ZIP file in your local user's Downloads folder or you need to update the script in the next step.![]()
- On the target machine, open a PowerShell prompt, navigate to the root of your C drive and execute the commands shown in the Create the agent section of the Get the agent screen. After a few seconds you should end up with an agents folder that contains the agent software.
- Next, still in PowerShell, run the config file by executing .\config.cmd. This will start a series of questions needed to install the agent:
- For the server URL, enter your DevOps URL in the format https://dev.azure.com/yourorganization.
- For authentication type, just press Enter to use a Personal Access Token as the authentication mechanism.
- Next, paste the PAT you created earlier and press Enter.
- For the agent pool, press Enter to use the default one, or enter the name of a new pool you created. If you get an authentication error here, make sure the PAT you are using has been set up to allow Read & manage access to Agent pools.
- For the agent name, press Enter to use the local machine's name, or type a custom name to describe your agent.
- For the work folder, press enter to accept the default of _work (C:\agent\_work) or provide a new name.
- If you get the question "Perform an unzip for tasks for each step", answering Yes will make your system a little more secure than when answering No. More details can be found here: https://github.com/microsoft/azure-pipelines-agent/issues/3185
- When asked to install the agent as a Windows service, you want to answer No if you're just experimenting a bit with the agent and want to be able to easily delete it again. For production scenarios, you want to choose Yes so the agent is always available as a Windows service, even after you reboot your machine.
- Finally for the user account, press Enter again to accept the default of the NT Authority\Network Service account.
- That's it. Your agent should now be registered with Azure DevOps and is ready to take on build requests. To verify the setup, navigate to the Agent pools section under Organization settings in Azure DevOps and confirm your agent is listed in your agent pool:
![]()


For the official Microsoft documentation on installing an agent, take a look here: https://docs.microsoft.com/en-us/azure/devops/pipelines/agents/v2-windows?view=azure-devops
Using your custom build agent in your builds
Now that the agent is installed, you can update your build process to make use of this agent. All this takes is updating the pool information in the YAML file so it points to your own agent. The next steps show you how to do this, and how to test the new configuration.
Log in to Azure DevOps and under Pipelines | Pipelines locate the YAML pipeline you want to update. In the pool section of the file, replace this:
pool:
  vmImage: 'windows-latest'
with something like this:
pool:
   name: Default
   demands:
    - agent.name -equals WIN-6GAVHDG5DNQR
You need to specify an explicit pool name and then point it to a specific agent in that pool by supplying its name which is either the Windows machine name, or the custom name you provided during the agent installation.
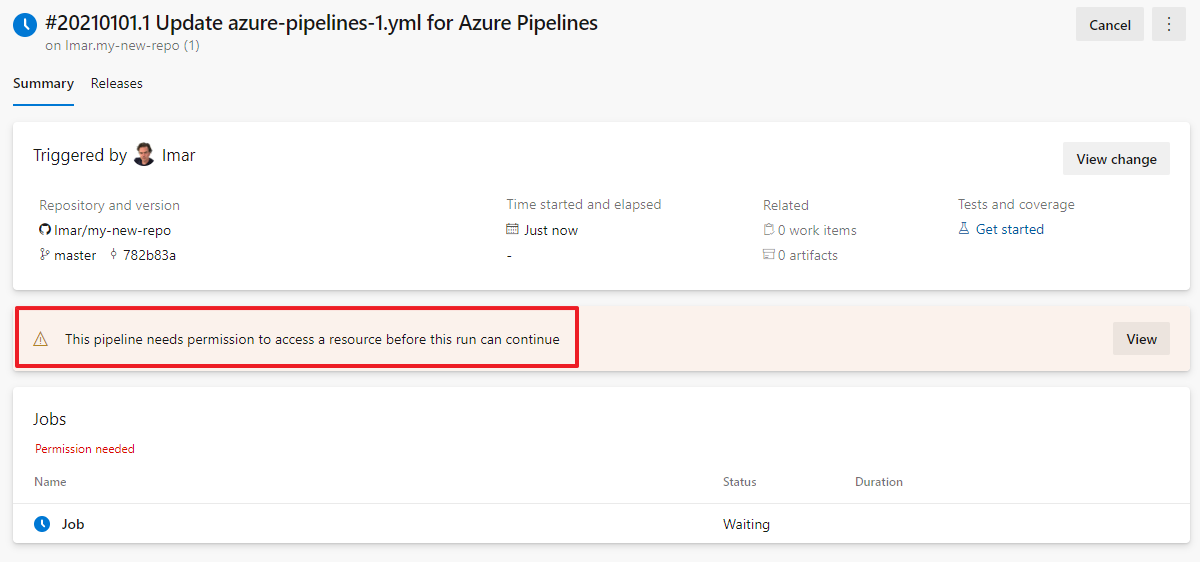
- When you now save your changes and run your pipeline you may get the following error:
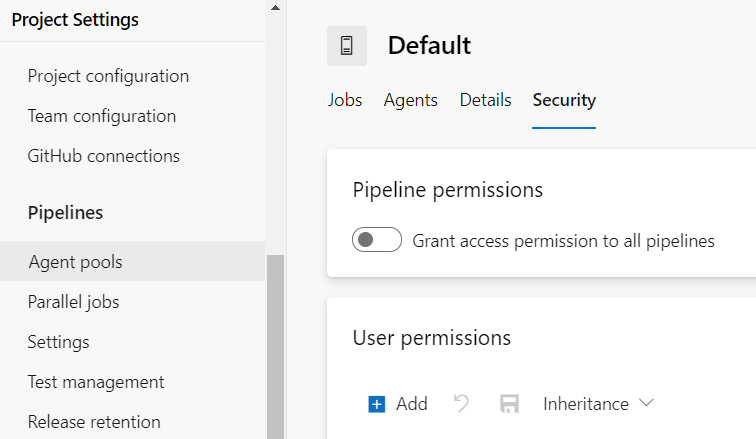
You can fix the permission for this pipeline and agent here, or you can change the permissions for all pipelines by choosing Project settings | Agent pools | your agent pool. Then on the Security tab you can turn on Grant access permission to all pipelines to make the pool available to all pipelines in your project.![]()
![]()
- When you now run the pipeline again, it may still not work and you may get an error like the following:
No agent found in pool Default which satisfies the specified demands: agent.name -equals WIN-6GAVHDG5DNQR, vstest, Agent.Version -gtVersion 2.163.1
Notice how the error indicates that the target machine is not able to supply the vstest demand. You may recall that earlier in the series I have added the execution of unit tests to the build pipeline. On the Azure supplied agents the software to run these unit tests is already installed. On your own machines, you have to do this yourself if you don't have it installed already. To do this, you have two options:
- Install Visual Studio on your agent machine
- Use the Visual Studio Test Platform Installer task to install the tools as part of the build process
I prefer the latter of the two as it's fairly simple to do and doesn't clutter up the target machine too much. It also makes it easy to target a different machine with your build scripts without having to install anything extra on that machine (other than the build agent of course). To install the tools as part of your build, add the following code to your YAML file, before the code that executes the tests:
- task: VisualStudioTestPlatformInstaller@1
  displayName: 'Visual Studio Test Platform Installer'
  inputs:
    versionSelector: latestStable
Instead of latestStable you can also choose latestPreRelease to get access to the latest available pre release versions or you can choose a fixed version by using specificVersion. In the latter case you must specify the version you want to use in the testPlatformVersion argument.
You can find more about this task in the documentation at this URL: https://docs.microsoft.com/en-us/azure/devops/pipelines/tasks/tool/vstest-platform-tool-installer?view=azure-devops. More information about the various test versions can be found here: https://www.nuget.org/packages/Microsoft.TestPlatform/
But even with this code in the pipeline, you'll probably get another error:
Visual Studio 2015 is not found. Try again with a version that exists on your build agent machine.The reason for this error is that even though the tools are now installed, the test runner isn't aware of that and tries to find the test tools elsewhere. To fix this, tell the VSTest task that you are installing the tools as part of the pipeline:
- task: VSTest@2
  inputs:
    testSelector: 'testAssemblies'
vsTestVersion: 'toolsInstaller'
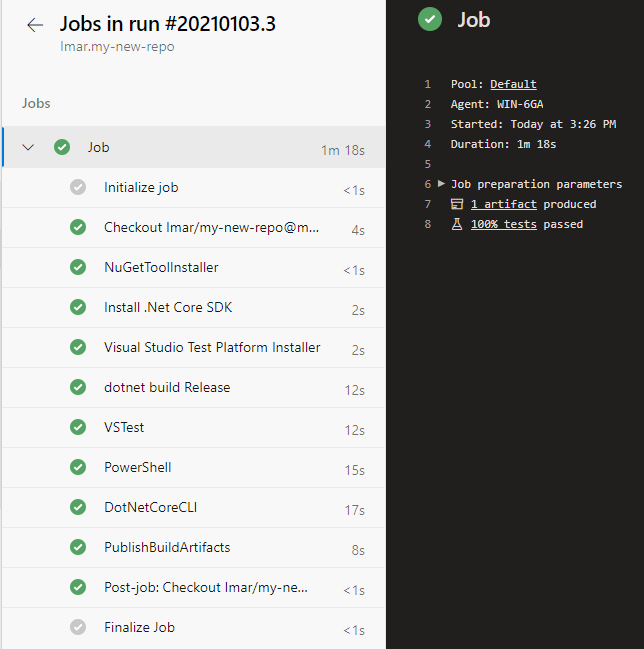
testAssemblyVer2: | **\*tests.unit*.dll !**\*TestAdapter.dll !**\obj\** !**\ref\** searchFolder: '$(System.DefaultWorkingDirectory)'- When you now run the pipeline, it should all work and your tests are executed as part of the build process:
![]()
More information about the VS Test task including an explanation of vsTestVersion can be found here: https://docs.microsoft.com/en-us/azure/devops/pipelines/tasks/test/vstest?view=azure-devops
That completes the basic set up of a custom build agent and the modifications you need to make to your build pipeline. You should see great performance improvements when comparing a custom build agent with the standard ones supplied by Microsoft as you no longer need to download all source code and NuGet packages on every build.
Improving uptime with deployment slots
In the previous article I showed you how to deploy a web site to an Azure App Service. During the deployment, your site is offline for your users while the contents of it are replaced with the new version. This leads to a bad user experience, but one that's easily solved using Deployment Slot in your Azure app service. A deployment slot is a live site web addressable by its own domain name, but connected to the main app service with which it shares many settings. You can use deployment slots for different purposes, such as setting up a staging site, A/B testing of new versions and to minimize downtime.
As a staging site, you would deploy a new version of your site to your deployment slot where you can test it internally using its own unique URL. Then when you're happy, you can swap the staging and production slots, making the staging slot the new live web site.
With A/B testing, you do more or less the same, but then you direct a percentage of your actual users to the staging copy. That then gives you the opportunity to test your site and measure its performance or user behavior using real users. If you send just a small percentage of your users to the staging site, you can still measure performance and behavior and see how the site behaves under some load, while not affecting too many users in case your new version doesn't work too well (in that scenario it's also easy to redirect all users back to the main, stable site while you fix your issues and then redeploy).
I use deployment slots often for the last scenario: minimizing downtime. Instead of deploying to the main site and taking it down during deployment, you deploy to a second slot that is only used for deployment. Then when the deployment is done and the slot is warmed up, you swap the deployment and production slots, taking your new version of your site live with minimal downtime.
In the next section you see how to create a deployment slot in Azure. The section that follows then shows you how to modify the release pipeline to take advantage of the new deployment slot.
Creating a deployment slot
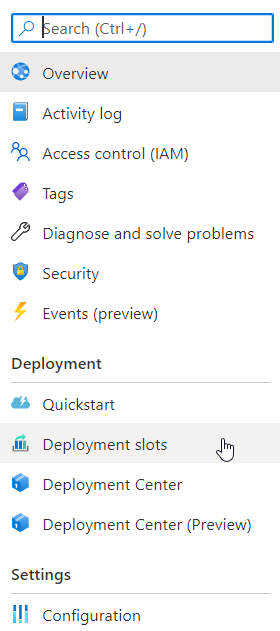
- Log in to the Microsoft Azure portal, find your App Service and click its Deployment Slots menu item:
![]()
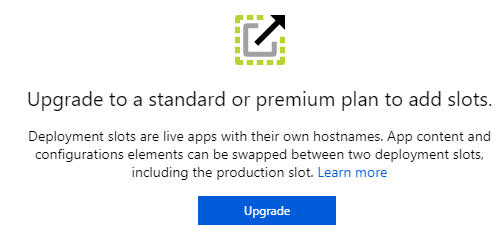
- Depending on your current hosting plan you may see the following error prohibiting you from creating a deployment slot:
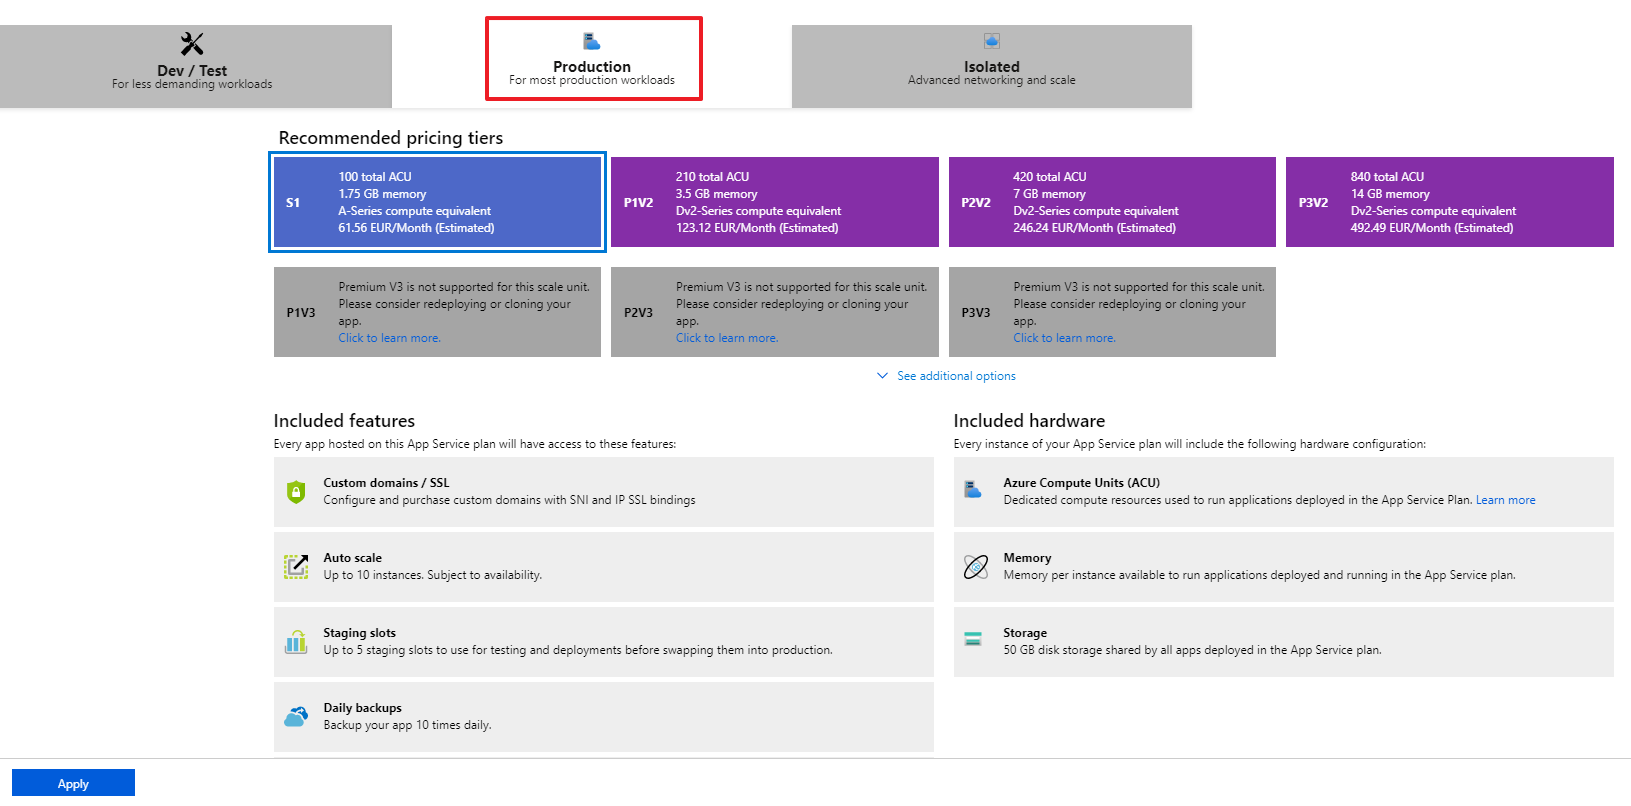
To use deployment slots, click Upgrade and then choose one of the Production tiers and click Apply:![]()
Note that this change means you'll now be charged for running the app service plan if you previously ran on the free plan. The estimated monthly costs are shown for each option. Also, upgrading the service may give the service a new IP address which means you may have to update your firewall rules.![]()
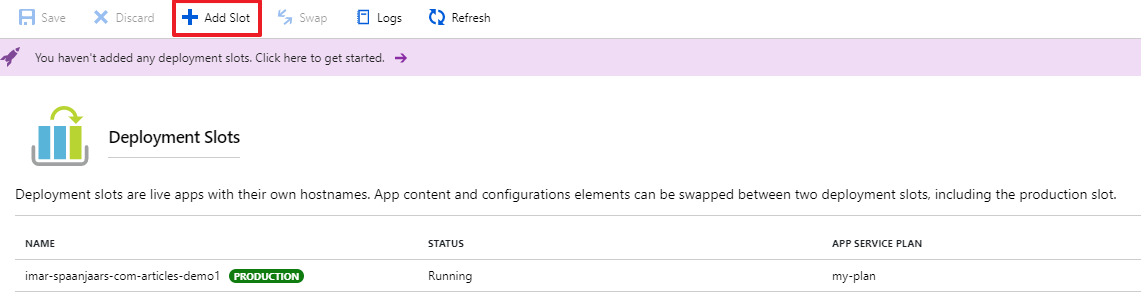
- Once you have a plan that supports deployment slots, browse to the Deployment slots menu again and choose Add Slot:
![]()
- Enter a name such as "staging" and select to copy the settings from the existing production slot. Click Add to create the slot. Once the slot is created, you can browse to it by appending a dash and the slot name to the existing site name. In my case that meant that the slot is available at: https://imar-spaanjaars-com-articles-demo1-staging.azurewebsites.net. For now, browsing to it will give you an error because the slot has been created, but not yet populated with code. That will be fixed with an update in the release pipeline as you'll see next.
Deploying to a deployment slot
Now that the slot has been created, you need to update the release pipeline to deploy to the new deployment slot instead of to the main site. Then once the site is released to that slot, you can swap the production and staging slots, making the freshly deployed staging slot the production site. Wether you do this automatically as part of the release pipeline or manually in the Azure portal is up to you. If you do it manually, you have a chance to test out the new site before you make it the production version, or even send a portion of the traffic to the new site to test it out with real users and measure performance for example.
Regardless of how you do the swap, deploying to the staging slot means that your main production slot remains online and continues to serve users. This means that your site remains responsive during deployment, and there will only be a very brief interruption when the slots are swapped.
For more information about Deployment Slots, check out these links:
- https://stackify.com/azure-deployment-slots/
- https://docs.microsoft.com/en-us/azure/app-service/deploy-staging-slots
In the next section you see how to modify your release pipeline to deploy to a deployment slot and then manually swap the production and staging slots in the Azure portal. Once that's all confirmed to work, I'll wrap up the process by modifying the pipeline again to perform the swap automatically after a successful release.
Note: the next steps assume you followed the walkthroughs from the previous article in this series that showed you how to set up a release pipeline to deploy to an Azure app service. if you haven't read that article, you should do that first as this one builds on top of the other one.
- Log in to Azure DevOps and click Pipelines | Releases. Find the pipeline that deploys to Azure and click Edit.
- Open the task Deploy Azure App Service
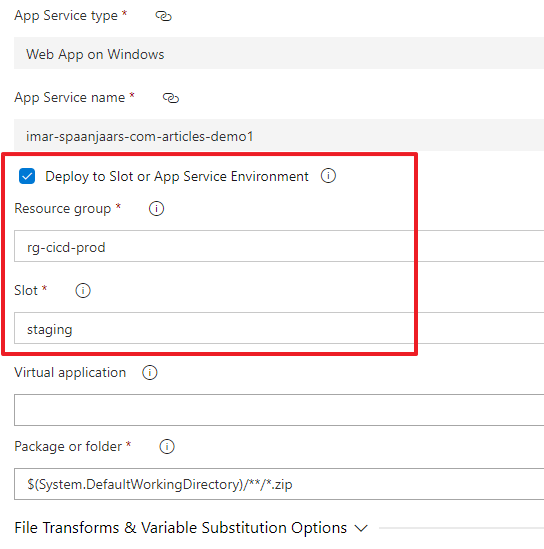
- Turn on the check box for the option Deploy to Slot or App Service Environment, choose your resource group and finally select the staging slot you created earlier under Slot:
![]()
- Next, click Save in the top-right corner and then click Create release next to the Save button. Finally, click Create to kick off the release process. After a while, the release is ready. You should now be able to browse to your slot's URL and see the site appear.
-
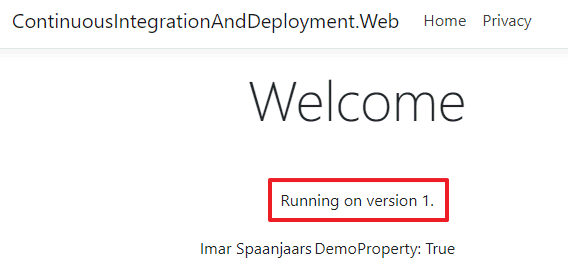
Next, go to Visual Studio and make a small change in your code. For example, for demo purposes, add a version number to the Index.cshtml view to quickly see which version your site is running on:
Running on version 1.<br /><br />
// Index.cshtml
<span>@person.FirstName @person.LastName
              @person.DateOfBirth DemoProperty: @person.DemoProperty</span><br />
Then commit and sync your changes. This will send your code to GitHub after which a build and a release are triggered. After a while you should see the updated version appear on the staging slot:
![]()
Your production site should still show the old version without the version number.
Next, go into the Azure portal, go into your App Service and click Deployment slots. On the toolbar at the top, click Swap. In the Source section choose the Staging environment (to which a new version of your site has just been deployed) and as the target choose the Production slot. Click Swap. The Azure portal now swaps the slots under the covers. When done, the production URL points to the slot that was on the staging URL previously and vice versa. In other words, your production URL now points to the latest release version whereas the staging URL now points to what was previously the production site. Swapping a slot is pretty quick, which means that downtime is very minimal.
If you like to automatically swap slots during a release you can configure the pipeline to do so after the release. This way, your entire code change cycle will look like this:
- You make code changes in Visual Studio and test locally. You commit locally as often as you see fit.
- When you're ready to integrate your code, you sync to GitHub.
- DevOps picks up the change and creates a build.
- DevOps then deploys that release to your staging slot. While that release is taking place, users can continue to browse to the production slot, ensuring no down time.
- After the release has been deployed, the DevOps pipeline swaps the two slots, making your most recent version the production one. This is a relatively quick process, leading to very little downtime for your end users.
To swap the slots automatically, follow these steps:
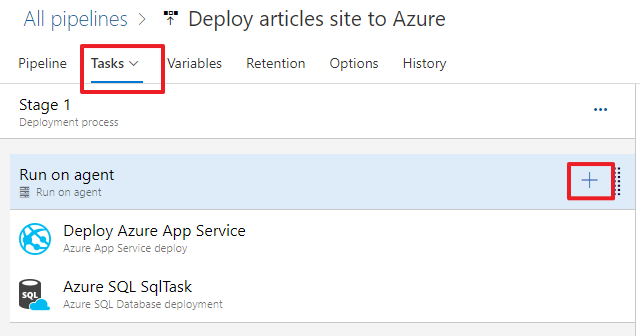
- Log in to Azure DevOps and click Pipelines | Releases. Find and select the pipeline that deploys to Azure (mine is called "Deploy articles site to Azure") and click Edit.
- In the bread crumb at the top click Tasks and then in the Run on agent group click the + symbol:
![]()
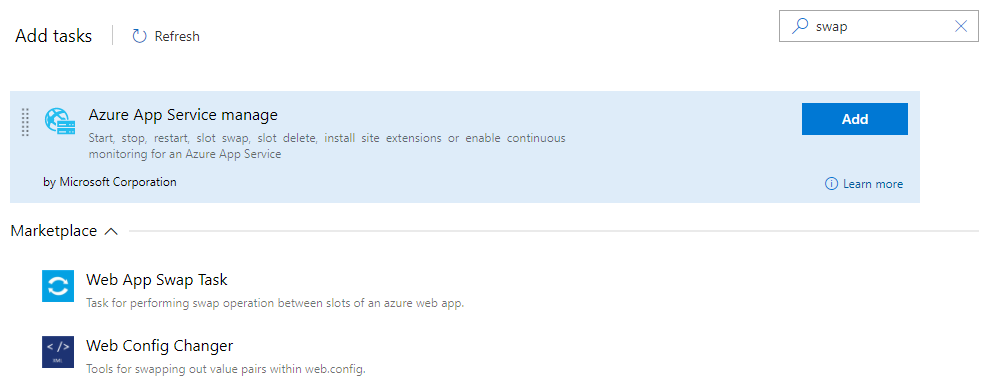
- In the list of available tasks, search for swap and then add the task "Azure App Service Manage":
![]()
Click Add to insert the task.
- Configure your subscription, app service name and resource group. Then choose staging as the source slot and leave Swap with production turned on. If you have multiple slots, you can turn off this check box and choose another slot to deploy to instead.
![]()
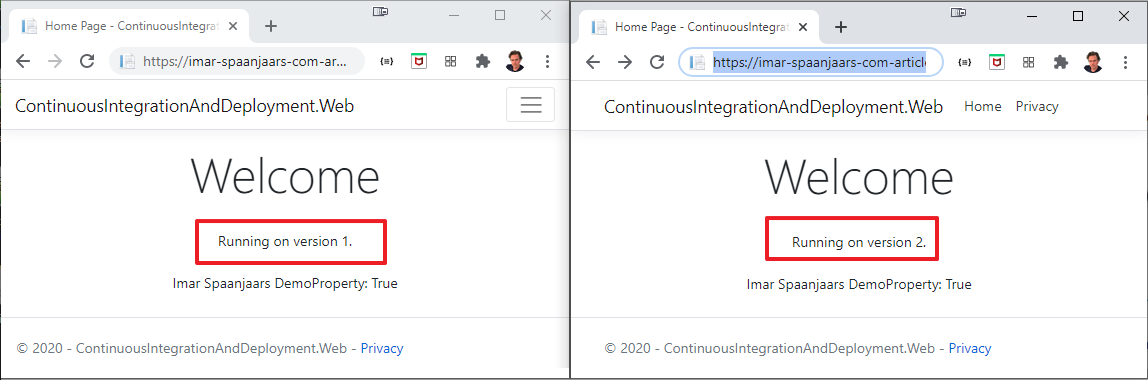
- Save your changes but don't create a new release from within the pipeline yet. Instead, go to Visual Studio and increase the version number in the Index.cshtml template file. Commit and sync your changes and grab a coffee or a beer (or whatever other drink you fancy, it doesn't really matter much for this walkthrough). After a while your production URL should show the new version of the site, while the staging environment shows the previous version:
![]()
While this release was in progress, the main production slot remained responsive until the swap happened, after which that slot then started serving new version of the site.

Note: whether or not the slots play well with your automated SQL migration scripts depends a bit on your setup and code changes. If you make non-breaking changes to your database, such as adding a nullable column, you can update the database during the release and only update the staging slot. That gives you an opportunity to test your site before swapping the slots. However, it'll be more likely that this won't work because quite often database changes cause breaking issues. For example, if you rename or delete a column, the previous version of your application will probably stop working. In the scenario where you deploy to the staging slot and then immediately swap the slots, this is less of a problem as there will be only one version of the application that is active for production use (the most recent one) and it points to the upgraded database.
If you have staging and deployment slots that exist side-by-side for a longer period of time, you should set up a second instance of your database so staging and production can both use a different schema.
There are a lot of other factors that you need to take into account here as well, both from the DevOps pipeline perspective as from the run-time and database configuration perspective. If you need help designing or building the right DevOps solution for your organization, consider hiring me on your project. I can be available for short consultancy sessions as well as for bigger projects helping you or your development team getting things set up.
Wrapping Up
When I came up with an idea of writing an article about CI/CD I didn't imagine it would be a 7-part series spanning around 80 pages. Yet as I started writing, more topics and ideas came up, turning this article series in a mini e-book on CI/CD. I felt that it was necessary to expand on so many areas though, as the topic itself is quite large and there are a lot of things to consider. In the past 7 articles, you've seen how to implement a full CI/CD solution with an ASP.NET Core site that uses Entity Framework. In particular, you saw:
- How to create the various accounts needed to host your source code, pipelines and production sites.
- How to create a simple ASP.NET Core web site using Entity Framework Core in a separate class library.
- How to manage change in your project, how to update your database and how to synchronize your changes with GitHub.
- How to set up a CI pipeline in Azure DevOps to automatically build and test your code whenever new code is committed to the GitHub repository.
- How to build a CD pipeline to automatically deploy your site to IIS on your own server and update the database using EF migrations.
- How to build a CD pipeline to automatically deploy your site to an Azure App Service and update the database using EF migrations.
- How to improve your build processes by setting up a custom build agent to improve performance and how to deploy to an Azure Deployment Slot to minimize downtime during your release.
I hope you enjoyed reading this series. If you have any questions about the topics discussed in this article series, or if you have suggestions that could improve these articles, please let me know.
Happy CICD'ing!
Where to Next?
Wonder where to go next? You can read existing comments below or you can post a comment yourself on this article.
Links in this Document
| Doc ID | 624 |
| Full URL | https://imar.spaanjaars.com/624/building-and-auto-deploying-an-aspnet-core-application-part-7-improving-your-build-and-release-processes |
| Short cut | https://imar.spaanjaars.com/624/ |
| Written by | Imar Spaanjaars |
| Date Posted | 05/17/2021 20:34 |
Talk Back! Comment on Imar.Spaanjaars.Com
I am interested in what you have to say about this article. Feel free to post any comments, remarks or questions you may have about this article. The Talk Back feature is not meant for technical questions that are not directly related to this article. So, a post like "Hey, can you tell me how I can upload files to a MySQL database in PHP?" is likely to be removed. Also spam and unrealistic job offers will be deleted immediately.
When you post a comment, you have to provide your name and the comment. Your e-mail address is optional and you only need to provide it if you want me to contact you. It will not be displayed along with your comment. I got sick and tired of the comment spam I was receiving, so I have protected this page with a simple calculation exercise. This means that if you want to leave a comment, you'll need to complete the calculation before you hit the Post Comment button.
If you want to object to a comment made by another visitor, be sure to contact me and I'll look into it ASAP. Don't forget to mention the page link, or the Doc ID of the document.