Storing Images as Serialized Strings in Code Instead of in Resource Files
Storing Images in the Assembly
When you add an icon to a menu item, Visual Studio stores the image in a resource file which is then compiled into the assembly. At run-time, the image is extracted from the assembly and shown next to the menu text. Figure 1 shows a sample menu with two menu icons:
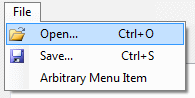
Figure 1: The File Menu
The reason why this is not so simple with My Generation is that a My Generation template is not a full blown WinForms application. It's merely a plain text code file that gets compiled at run-time (using Dot Net Script in the case of VB.NET or C# templates). So, you don't really have a resource file, you don't have a true assembly that you can embed the icon into which in turn means you can't extract the icon at run-time. I wanted to avoid using network paths to point to the images as that's quite fragile (images could be deleted, users without network access wouldn't be able to point to the image files and so on). So, I had to come up with something else.
Storing Images as Strings in Code
After thinking about it for a while, I came up with a solution that is simple yet elegant: store the images as strings in the code file, and at run-time convert them back to images. The conversion from an image to a string is a three-step process: convert the image into a stream, the stream into a byte array and then convert the byte array into a string. To convert the string back to the image you need to reverse the process: convert the string to a byte array, then convert the byte array to a stream and finally load the stream into an image.
The sample application that comes with this article shows both concepts. It has a Browse for an Image button that allows you to select an image file which can be added as an image next to the menu item, as depicted in Figure 1. As soon as you select the image, it's converted to a string which is displayed in a TextBox control. (Other code can then take this string, reconstruct the image on the fly and display the image next to the menu. You'll see how that works later.) The following code is responsible for converting the image to its string representation:
C#
private string GetStringFromImage(string fileName)
{
  Image image = Image.FromFile(fileName);
  using (MemoryStream myStream = new MemoryStream())
  {
    image.Save(myStream, ImageFormat.Gif);
    return Convert.ToBase64String(myStream.ToArray());
  }
}
This function expects the file name (retrieved from a OpenFileDialog control in the sample application) and then loads an image using the static FromFile method. It then loads the selected image in a Stream as a Gif type (other types, like Jpeg and Png are supported as well), calls the ToArray method of the stream to convert it to a byte array and then passes that array into the ToBase64String method of the Convert class to get a simple string representation. The TextBox control will show something like this:
R0lGODlhEAAQAPcAABYSDhgTDh4ZFCkiGzUuJUM6LltKIVtLIlJIOWFWRG9iTmhkWnNmUHtuV0xnk09pk
E9okVNqjlRrjV90lGB0lXiJoZZyH593G4BnI4FpJal8FYd5YPwC/LSCD76ICI+AZo+EdZKHd5OId5WLeZ
WKepeMepyPdZmOepiOfZqQfp2RfKGVf8eMBM2PAM2FENSME9uiLuWgJOmoKeuqLuysMe6wNPCzN/K2O/W
5P9GpVtSyatO+fve7QfW8Qfe+RvrBSfrETPzFS/zHTv7JUf/LVf/NVP/NWP/OXP/PX//QX+DFfezSef/R
Yv/TZf/UZ//TaP/Wa/vUcf/Ycf/YdP/aev/de//cfpyRgJ+Ugp+Vg5+Wi4GRpoeVqqOZhqOahqaagaWci
Keeiaqfg6+jhquhiaigi6qhjauijq6kiq2ki6ykj7OmiLCmjLCnjrGojbeqirmsi7q3tLvCzbvD0ce6jM
7Cid7EgNPLudLLvNrSoO/XgfHcif7dgP7egf/ghP/ijPLhkvPmmvvrn/3omPbqoPbup/nupvfwq8vQ2sz
Q2tTSz93a0wAAAAAAAAAAAAAAAAAAAAAAAAAAAAAAAAAAAAAAAAAAAAAAAAAAAAAAAAAAAAAAAAAAAAAA
AAAAAAAAAAAAAAAAAAAAAAAAAAAAAAAAAAAAAAAAAAAAAAAAAAAAAAAAAAAAAAAAAAAAAAAAAAAAAAAAA
AAAAAAAAAAAAAAAAAAAAAAAAAAAAAAAAAAAAAAAAAAAAAAAAAAAAAAAAAAAAAAAAAAAAAAAAAAAAAAAAA
AAAAAAAAAAAAAAAAAAAAAAAAAAAAAAAAAAAAAAAAAAAAAAAAAAAAAAAAAAAAAAAAAAAAAAAAAAAAAAAAA
AAAAAAAAAAAAAAAAAAAAAAAAAAAAAAAAAAAAAAAAAAAAAAAAAAAAAAAAAAAAAAAAAAAAAAAAAAAAAAAAA
AAAAAAAAAAAAAAAAAAAAAAAAAAAAAAAAAAAAAAAAAAAAAAAAAAAAAAAAAAAAAAAAAAAAACwAAAAAEAAQA
AAI0gA5CBxIsKDBglsqcJFzkCCFOQK3IJqwSI1Fi3cMJpLwQE2eQ4cMCTKDp2AECA7OFAopaFCUMF2wpC
ghYmAZQiIHUXHCs2dNgWACtYQD582aMWK+rFBxYoQIL4AG2WnTx49VP32qTIGSQ0uWPX/c0JnSM0mRIDx
gMOBwRY8SNnyeOGFiRIiPGzQymOCAYkmaOlKaHBnyA0cNGS4OKOJAYgcaK0iIAOlhY0aMFxgWCAxBRkeL
zyw8dNBwwYKBOAJBfNjQQEECBAUIDBAAIEDD2wIDAgA7
Once you have the string representation of the image, you can simply copy and paste it and store it in a string variable in your code. You can then use that string to recreate the image at run-time. In the sample application, the following code is responsible for converting the image from a string:
C#
private void SetMenuImage(string image, ToolStripMenuItem menu)
{
  byte[] imageAsBytes = System.Convert.FromBase64String(image);
  using (MemoryStream myStream = new MemoryStream(imageAsBytes, 0, imageAsBytes.Length))
  {
    System.Drawing.Image newImage;
    myStream.Write(imageAsBytes, 0, imageAsBytes.Length);
    newImage = Image.FromStream(myStream, true);
    menu.ImageTransparentColor = System.Drawing.Color.FromArgb(252, 2, 252);
    menu.Image = newImage;
  }
}
This code accepts the image as a string representation and converts it to a byte array. It then loads this byte array into a Stream which is then used to recreate the image. The image is then assigned to the ToolStripMenuItem that has been passed as well. In case you're wondering what ImageTransparentColor does: it's used to determine the RGB color of the loaded image that must appear as transparent, allowing you to see what's behind it. That way, you can create menu images that nicely blend in with the background of the menu.
The SetMenuImage function is called from three locations in the sample application. It's called from the Load Icon From TextBox button that takes the string representation of the image in the text box and loads it in the final menu item of the File menu. The two other buttons load two "known" icons: an open folder and a floppy disk. Here's the code for the Save icon:
C#
private void btnLoadSaveIcon_Click(object sender, EventArgs e)
{
  string saveAsIcon = @"R0lGODlhEAAQAPcAAAAAACEyRzQ8RzMzZzc2bjk5cjw7eD4+fUhNVktbcVJ
    idltqfRE7oTE5mDM+njU9nBxBpyREqihHrTVBozxCojxCozRNsz9SuEFBg0REiUdHj0pKlE1NmlBPn0NL
    rkRJqkxPskxQsktYvlNSpFZVqlRWullYsGd0hWh4jXN/j1ZexFxdwVxdwmVkw2BjyWdmzGxrz2xr0W5t0
    3Bv0XJx13V003Z11Hd23Ht61nx713p53/wC/IGA2oSD24iH3YuK34GA5oeG7I+O4IqJ74+O84+O9JKR4p
    ST5JiX5Zua55+e6ZGQ9ZST9ZOS+JqZ/6Cf+6Cf/6u0w7O7xqKh6qem7ain7qSj/K2s8K6t8aqp/66t/7O
    y87e29bSz/7e2/7y7/769/7zByr3K4cTIzsbR5c7Z6dLb6tTd7Njg7d7l8ODn8eru9vb4+////wAAAAAA
    AAAAAAAAAAAAAAAAAAAAAAAAAAAAAAAAAAAAAAAAAAAAAAAAAAAAAAAAAAAAAAAAAAAAAAAAAAAAAAAAA
    AAAAAAAAAAAAAAAAAAAAAAAAAAAAAAAAAAAAAAAAAAAAAAAAAAAAAAAAAAAAAAAAAAAAAAAAAAAAAAAAA
    AAAAAAAAAAAAAAAAAAAAAAAAAAAAAAAAAAAAAAAAAAAAAAAAAAAAAAAAAAAAAAAAAAAAAAAAAAAAAAAAA
    AAAAAAAAAAAAAAAAAAAAAAAAAAAAAAAAAAAAAAAAAAAAAAAAAAAAAAAAAAAAAAAAAAAAAAAAAAAAAAAAA
    AAAAAAAAAAAAAAAAAAAAAAAAAAAAAAAAAAAAAAAAAAAAAAAAAAAAAAAAAAAAAAAAAAAAAAAAAAAAAAAAA
    AAAAAAAAAAAAAAAAAAAAAAAAAAAAAAAAAAAAAAAAAAAAAAAAAAAAAAAAAAAAAAAAAAAAAAAAAAAAAAAAA
    AAAAAAAAAAAAAAAAAAAAAAAAAAAAAAAAAAAAAAAAAAAAAAAAAAAAAAAAAAAAAAAAAAAAAAAAAAAAAAAAA
    AAAAAAAAAACwAAAAAEAAQAAAI2AB3CBxIsKBALly2YKkyJckRIT544KgxQ+AWME3aaNzYho0IEyYEXgEz
    hKNGNmsuDCAhkAoYICZRprGgY4RAJWBucJRpRgKNDgKRgJGxkScZCC84CDQC5sXJNWnMkBHDgMUGgT++e
    HGhQsQFCxIgMFhRQoPAHl20WCkSBIgOGjHIhsggMEeWJ0wS6E2gYEEJEB8wCLQBZUmQBAAElDlzwsOHCg
    cEznDSNoEAFGjUpJhA4YEBgTCIAIkQIIqUMGMQOHjQoADoFiRGdOCwQUMGDAYMFCBgsDfBgAA7";

  SetMenuImage(saveAsIcon, saveToolStripMenuItem);
  MessageBox.Show("Save icon loaded. Open the File menu to see the icon.");
}
To see the newly loaded icon, simply open the File menu.
Although the code examples are used to load images into WinForm menus, you can of course use the same concept anywhere you need an image.
Summary
Quite often I am amazed by the power and simplicity of what .NET has to offer. Loading icons next to a menu item used to be very hard before .NET came along. Now the IDE makes this task very simple, taking care of (de)serialization issues for you. However, sometimes you need a bit more control and handle the (de)serialization process of the image through code as was the case in my application. Even then, all you need for a seemingly complex task as loading an image is a few lines of code.
Download Files
Source Code for this Article - Shows how to Serialize and Deserialize an Image to a StringWhere to Next?
Wonder where to go next? You can post a comment on this article.
Links in this Document
| Doc ID | 471 |
| Full URL | https://imar.spaanjaars.com/471/storing-images-as-serialized-strings-in-code-instead-of-in-resource-files |
| Short cut | https://imar.spaanjaars.com/471/ |
| Written by | Imar Spaanjaars |
| Date Posted | 09/16/2008 20:42 |
| Listened to when writing | Herfst En Nieuwegein by Spinvis (Track 8 from the album: Spinvis) |
Comments
Talk Back! Comment on Imar.Spaanjaars.Com
I am interested in what you have to say about this article. Feel free to post any comments, remarks or questions you may have about this article. The Talk Back feature is not meant for technical questions that are not directly related to this article. So, a post like "Hey, can you tell me how I can upload files to a MySQL database in PHP?" is likely to be removed. Also spam and unrealistic job offers will be deleted immediately.
When you post a comment, you have to provide your name and the comment. Your e-mail address is optional and you only need to provide it if you want me to contact you. It will not be displayed along with your comment. I got sick and tired of the comment spam I was receiving, so I have protected this page with a simple calculation exercise. This means that if you want to leave a comment, you'll need to complete the calculation before you hit the Post Comment button.
If you want to object to a comment made by another visitor, be sure to contact me and I'll look into it ASAP. Don't forget to mention the page link, or the Doc ID of the document.