Recommendations for setting up a Visual Studio Solution for TFS
Over the past weeks I received a number of requests to explain how I typically set up my Visual Studio projects so they are easy to manage across a team that uses Team Foundation Server (TFS). I received another request from a client just this week and instead of helping him over the phone or paying him a visit and do it for him, I decided to write a quick document with instructions which eventually resulted in this article.
In this article you'll see how to create a multi-project solution in Visual Studio. I'll show you how you can use this structure to set up an ASP.NET MVC 3 application with a separate class library project for business logic and one or more unit test projects. However, you can use the exact same principles for other types of Visual Studio projects such as Web Forms, Win Forms, WCF and more. Over the past years, I found that this set up brings me the following benefits:
- It has a clear structure, making it easy to figure out where to find or store something
- It can be retrieved from TFS without any hassle
- It allows for easy branching
- It resolves most reference issues to third party assemblies
This is just my take at setting it up. If you find anything wrong, or have better alternatives to accomplish the same thing: feel free to speak up using the Comments section at the end of this article.
Without further ado, let's get started.
This document assumes a namespace convention for your projects and solutions of CustomerName.ProjectName.LayerOrAppName. The solution will be called CustomerName.ProjectName and each project then gets its own suffix explaining what it's used for. In this article I'll use CustomerName.ProjectName literally, but obviously you would substitute that for a real client and project name.
Setting up the Solution in Visual Studio
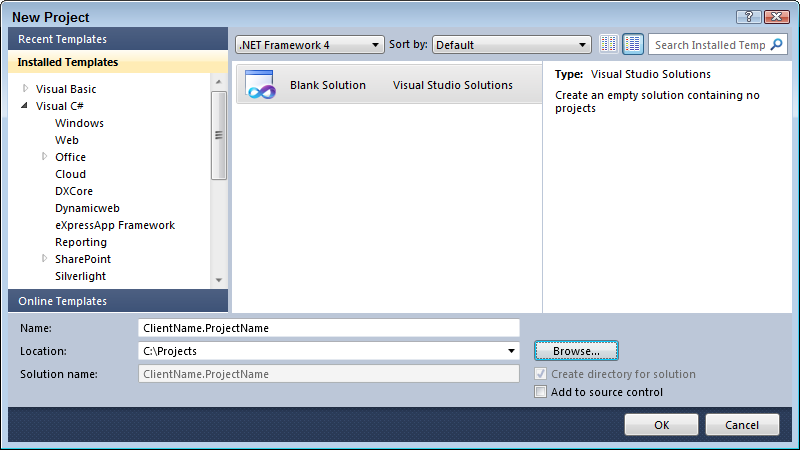
- Start Visual Studio (I am using 2010 but this applies to older and newer versions as well) and choose File | New Project.
- In the Other Project Types category click Visual Studio Solutions and then click Blank Solution. As the name of the Solution, enter ClientName.ProjectName and as the Location choose C:\Projects:

Figure 1 (click to enlarge) - Click OK.
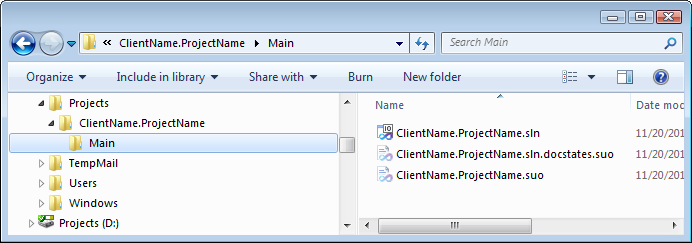
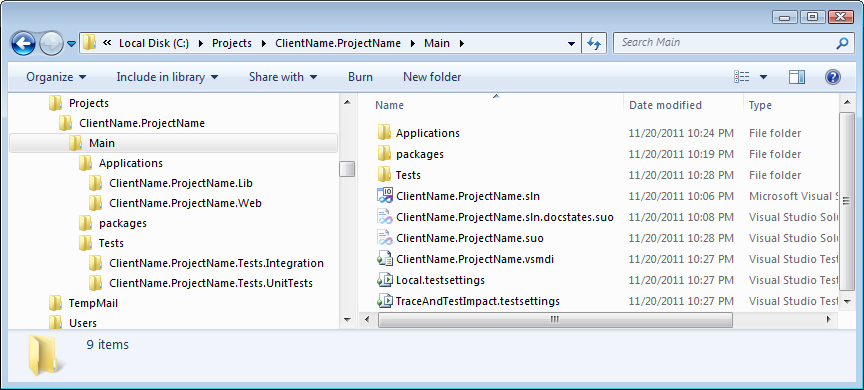
- Close Visual Studio and open the Project folder in Windows Explorer (at C:\Projects\ClientName.ProjectName). Create a new folder called Main and then drag all of the ClientName.ProjectName.* files from C:\Projects\ClientName.ProjectName into this new main folder. Your structure now looks like this:

Figure 2 (click to enlarge)This Main folder is used later for Branching in TFS. (This all feels a bit clumsy but I see no other way to create the solution with this name and store it in a folder called SolutionName/Main. Fortunately, this is a one-time operation.)
- Open the Solution in Visual Studio by double-clicking the .sln file in the Main folder.
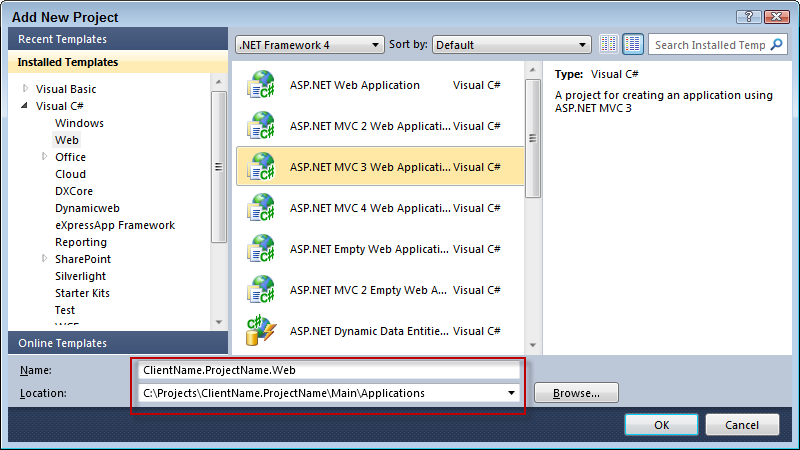
- Right-click the Solution in the Solution Explorer and choose Add | New Project.
- In the tree on the left, choose a project type such as an ASP.NET MVC 3 Application.
- As the name of the project, enter ClientName.ProjectName.Web.
- As the location for the project enter C:\Projects\ClientName.ProjectName\Main\Applications:

Figure 3 (click to enlarge) - Click OK and finalize the project configuration.
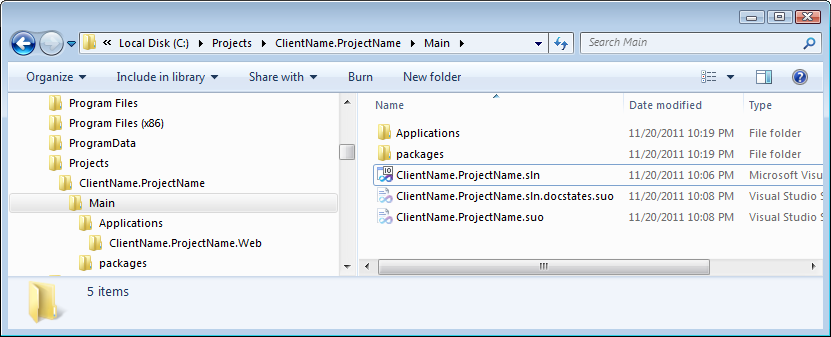
- On disk, your solution now has the following structure:
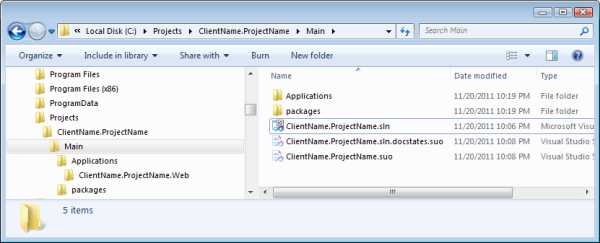
Figure 4 (click to enlarge) - Right-click the Solution again and now add a Class Library project named ClientName.ProjectName.Lib. As the Location for the project, choose C:\Projects\ClientName.ProjectName\Main\Applications again:
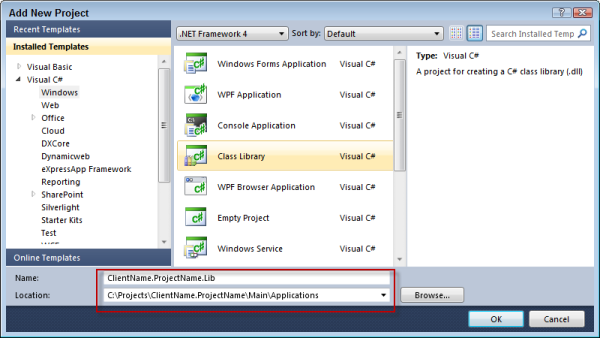
Figure 5 (click to enlarge) - Add a reference to the Lib project from the Web project and perform any other necessary project setup and initialization. Add other projects as needed, storing each of them in the C:\Projects\ClientName.ProjectName\Main\Applications.
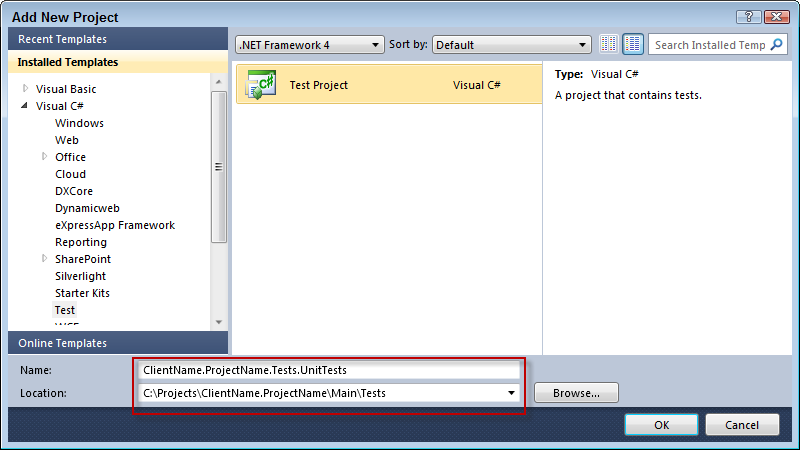
- [Optional] Right-click the Solution again and add a test project. Call it ClientName.ProjectName.Tests.UnitTests and store it in the folder: C:\Projects\ClientName.ProjectName\Main\Tests:

Figure 6 (click to enlarge) - [Optional] Create more test projects such as ClientName.ProjectName.Tests.Integration and store each of them in the folder C:\Projects\ClientName.ProjectName\Main\Tests.
- [Optional] In your test projects, add references to your various application projects (such as the Web and Lib projects).
- [Optional]: Create a new Solution Folder called Tests (right-click the Solution and choose Add | New Solution Folder) and then drag your test projects into this folder. This keeps all your test projects nicely packed together. Your Solution Explorer should now look like this:
while on disk your Solution should look like this: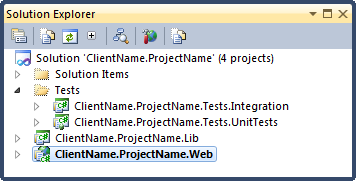
Figure 7

Figure 8 (click to enlarge) - Finalize the configuration of your projects and do a full rebuild to ensure everything is set up correctly. Resolve any compilation errors you may have.

With this setup, all your projects are located in sub folders of the Main folder that contains the Solution File. This in turn makes it easy to manage the solution from a TFS point of view because all references between the various projects and assemblies can be resolved relative to the main solution.
If you ever have the need to add new projects, just follow the exact same steps: add applications under the Applications folder and tests under the Tests folder. When another developer then gets a latest version of the solution from source control, the new projects are downloaded automatically as well. Obviously, in order for all this to work, you need to add the solution to Team Foundation Server Source Control first, which is the topic of the next section.
TFS Initial Setup
- Right-click the Solution in the Solution Explorer and click Add Solution to Source Control.
- Choose a Team Project and click Connect.
- Choose the appropriate TFS Project
- As the name for the solution folder, enter ClientName.ProjectName/Main The /Main part is not a typo. In fact, it's very important, as it’ll create an additional folder in TFS which you can set up as main branch later.
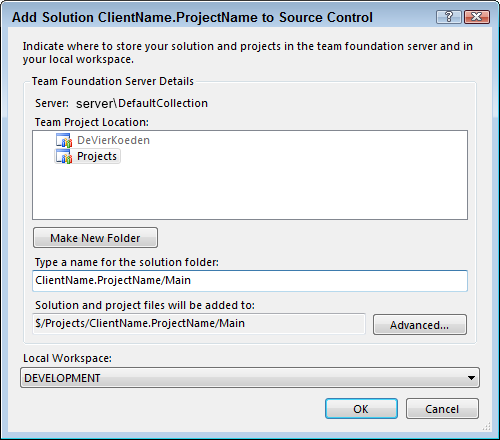
Figure 9 - Click OK.
- Your Source Control Explorer should now look like this:
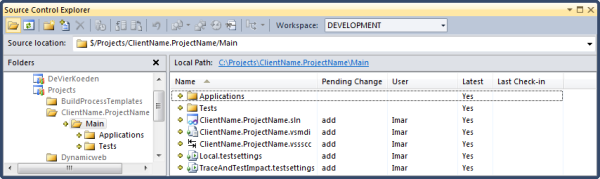
Figure 10 (click to enlarge) - Right-click the Solution Explorer and choose Check In.
- As a comment, enter something like Initial Commit and click Check In.
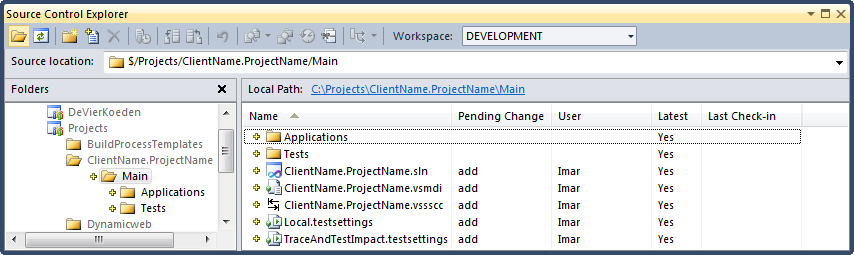
- Open the Source Control Explorer, locate the Main folder for this Solution, right-click it and choose Add Items to Folder. Double-click the Packages folder and then press Ctrl+A to select all files and folders. Click Next and then on the Excluded Items tab make sure no files or folders are selected (select those that are and click Include Item(s)). Normally, you want to exclude files such as assemblies as they can be considered recreatable. However, the Packages folder contains third party libraries (by default, this folder is created by the Nuget Package Manager, but I now use Packages for my own third-party assemblies as well) that you do want included in TFS to ensure everyone gets the necessary files when getting a latest version of that folder from TFS. Click Finish to add the files. Then right-click the Packages folder and click Check In Pending Changes to add the files to TFS.
- Still in the Source Control Explorer, locate the Main folder for this Solution, right-click it and choose Branching and Merging | Convert to Branch.
- Enter a description such as Main Branch and click Convert.
- That’s it. From now on, other developers can get a local copy of this Solution simply by opening the .sln file from the Main folder. If they need a copy of the Packages folder as well, they can simply right-click it in the Source Control Explorer and choose Get Latest Version.
TFS Branching
After some time, development on the Main branch can be ready for a release. In order to let developers continue work on the Main branch while you prepare the release, you should branch the application. For example, you can branch of “Beta 1” and release that.
Note: in this model I assume the Main branch is where continuous development takes place, while releases are branched off this main branch. If you use a different branching model this section does not apply directly, but the principles remain the same.
In order to create the branch, follow these steps:
- Open the Source Control Explorer, locate the Main branch, right-click it and choose Branching and Merging | Branch. As the Target Branch Name enter something like $/Projects/ClientName.ProjectName/Beta1:
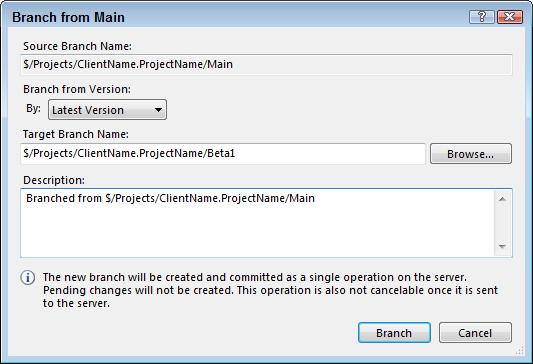
Figure 11 - Click Branch
You now have two separate branches of the same application. Long-term development goes on in the Main branch while you can make changes to Beta 1 necessary for the release. In addition, bugs you find in Beta 1 can be fixed there and propagated to the Main branch or vice versa.
If you want to work on the Beta 1 version, double-click its .sln file in the Solution Explorer. Then enter C:\Projects\ClientName.ProjectName\Beta1 as the path for the application so your two branches end up side-by-side on your disk. In addition, you may need to get a local copy of the Packages folder in order to get all of the third-party assemblies and other files.
Hope you find these instructions useful. And if you have improvements or alternatives: post them below using the comments feature!
Where to Next?
Wonder where to go next? You can post a comment on this article.
Links in this Document
| Doc ID | 565 |
| Full URL | https://imar.spaanjaars.com/565/recommendations-for-setting-up-a-visual-studio-solution-for-tfs |
| Short cut | https://imar.spaanjaars.com/565/ |
| Written by | Imar Spaanjaars |
| Date Posted | 11/20/2011 16:54 |
Comments
Talk Back! Comment on Imar.Spaanjaars.Com
I am interested in what you have to say about this article. Feel free to post any comments, remarks or questions you may have about this article. The Talk Back feature is not meant for technical questions that are not directly related to this article. So, a post like "Hey, can you tell me how I can upload files to a MySQL database in PHP?" is likely to be removed. Also spam and unrealistic job offers will be deleted immediately.
When you post a comment, you have to provide your name and the comment. Your e-mail address is optional and you only need to provide it if you want me to contact you. It will not be displayed along with your comment. I got sick and tired of the comment spam I was receiving, so I have protected this page with a simple calculation exercise. This means that if you want to leave a comment, you'll need to complete the calculation before you hit the Post Comment button.
If you want to object to a comment made by another visitor, be sure to contact me and I'll look into it ASAP. Don't forget to mention the page link, or the Doc ID of the document.