Howto Use Embedded Images in a Pocket PC Application
Prerequisites
For this example you'll need to import the System.Reflection namespace, as this namespace contains the Assembly class that is used to retrieve the image at run-time.Creating the PocketPC Application
Start by creating a new Smart Device Application from the New Project dialog. You can choose between a C# or a Visual Basic .NET application as this example will show the code for both languages. Choose Pocket PC as the platform you want to target and choose Windows Application as the type of project: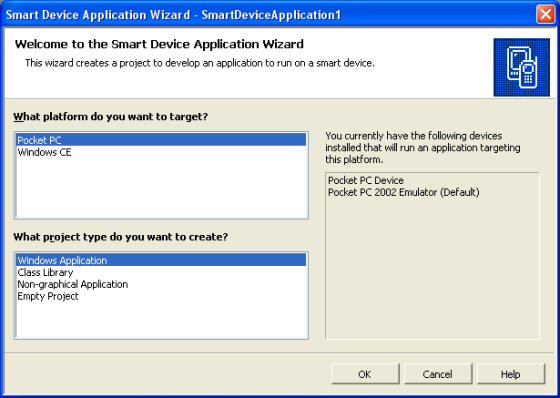
Figure 1 - The Smart Device Application Wizard
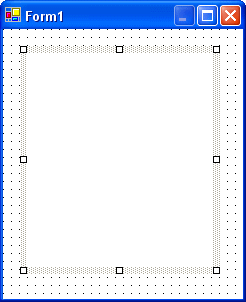
Figure 2 - A Smart Device Application Form with a Picturebox
Embedding the Image
With the form done, you'll now need to add an image to the project. This image will be embedded in the assembly and displayed on the Picturebox you just added. To do this, right-click your project in the Solution Explorer, choose Add | Add Existing Item and then browse for the image you want to display on your Pocket PC form. The image will be copied to the project folder and added to the project. Select the image in the Solution Explorer and then open the Properties Window by pressing F4 if you didn't have it open yet. Set the Build Action under the Advanced category to Embedded Resource as shown in the following figure: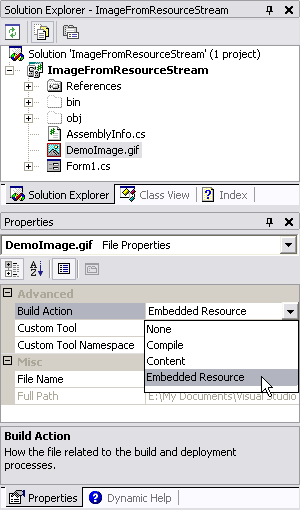
Figure 3 - The Properties grid for the Embedded Image
Retrieving the Image
The next step is to write some code that will read the image from the assembly atrun-time and display it on the Picturebox.
In both VB.NET and C#, you'll need to import the System.Reflection namespace to save you from typing the full path to the Assembly class every time you need it. At the top of your page, below the other using or Imports statements you may have, but before your Class definition, add this line for C#:
using System.Reflection;
Imports System.Reflection
Next, double-click somewhere on an empty spot of the Form (make sure you don't accidentally hit the Picturebox). Visual Studio .NET will switch to code view and has added a default handler for the Form1_Load event. Add the following code inside the handler for a C# project:
private void Form1_Load(object sender, System.EventArgs e)
{
  Bitmap MyBitmap = new Bitmap(Assembly.GetExecutingAssembly().
  GetManifestResourceStream("ImageFromResourceStream.DemoImage.gif"));
  pictureBox1.Image = MyBitmap;
}
Private Sub Form1_Load(ByVal sender As System.Object, _
           ByVal e As System.EventArgs) Handles MyBase.Load
  Dim MyBitmap As Bitmap = New Bitmap _
      (System.Reflection.Assembly.GetExecutingAssembly(). _
      GetManifestResourceStream("ImageFromResourceStream.DemoImage.gif"))
  PictureBox1.Image = MyBitmap
End Sub
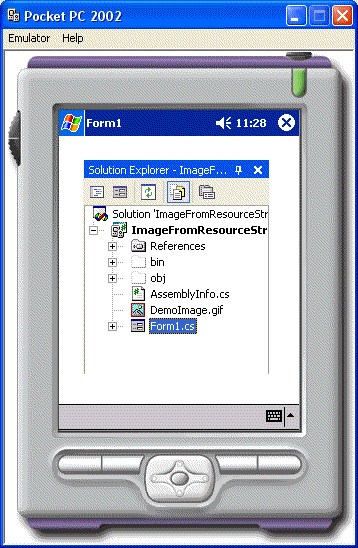
Figure 4 - The image is loaded from the assembly and displayed on the form
How It Works
The most interesting part of this example is the code that retrieves the image. The method GetManifestResourceStream does all the hard work, by retrieving the image from the current, or Executing assembly. Instead of just passing the filename, you'll need to pass the name of the Default Namespace or Root namespace and the name of the image. You'll find the Default Namespace on the Properties dialog of a C# project, while the Root namespace is found on the Properties dialog for a Visual Basic project. Even if your current class uses a different namespace, you'll still need to refer to the image using the default or root namespace.Note that the Visual Basic .NET example uses the complete namespace to reference the Assembly class (System.Reflection.Assembly). By using the the full namespace, you no longer need to use the Imports statement at the top of the form. If you decide to leave out the System.Reflection prefix, you'll need to enclose the word Assembly in a pair of brackets:
 Dim MyBitmap As Bitmap = New Bitmap _
    ([Assembly].GetExecutingAssembly(). _
    GetManifestResourceStream("ImageFromResourceStream.DemoImage.gif"))
  PictureBox1.Image = MyBitmap
When you have stored your images in separate folders (in a Project in VS.NET it's easy to create subfolders to group related files more logically together), you'll need to add the name of that folder between the default namespace and the name of the image, separated by a period. This applies only to C# projects:
  Bitmap MyBitmap = new Bitmap(Assembly.GetExecutingAssembly().
      GetManifestResourceStream(
      "ImageFromResourceStream.Images.Demo.DemoImage.gif"));
  pictureBox1.Image = MyBitmap;
For Visual Basic, you can still use the same code I showed you earlier. Apparently Visual Basic handles the way images are stored in the assembly a bit different so there is no need to tell it where you stored the image.
Summary
Embedding images in the assembly is a convenient way to make sure that the image is always present at run-time. At first it may be a bit difficult to retrieve the images again, but with the code I showed you here that should now be moderately easy.Take care not to store too large images in the assembly as this will slow down load times of your application. Try to optimize the images using your favorite graphics editor before you add them to save space. Alternatively, you can choose to deploy large images as separate files, together with your application.
Download Files
Where to Next?
Wonder where to go next? You can post a comment on this article.
Links in this Document
| Doc ID | 168 |
| Full URL | https://imar.spaanjaars.com/168/howto-use-embedded-images-in-a-pocket-pc-application |
| Short cut | https://imar.spaanjaars.com/168/ |
| Written by | Imar Spaanjaars |
| Date Posted | 10/06/2003 22:49 |
| Date Last Reviewed | 12/08/2006 14:37 |
Comments
Talk Back! Comment on Imar.Spaanjaars.Com
I am interested in what you have to say about this article. Feel free to post any comments, remarks or questions you may have about this article. The Talk Back feature is not meant for technical questions that are not directly related to this article. So, a post like "Hey, can you tell me how I can upload files to a MySQL database in PHP?" is likely to be removed. Also spam and unrealistic job offers will be deleted immediately.
When you post a comment, you have to provide your name and the comment. Your e-mail address is optional and you only need to provide it if you want me to contact you. It will not be displayed along with your comment. I got sick and tired of the comment spam I was receiving, so I have protected this page with a simple calculation exercise. This means that if you want to leave a comment, you'll need to complete the calculation before you hit the Post Comment button.
If you want to object to a comment made by another visitor, be sure to contact me and I'll look into it ASAP. Don't forget to mention the page link, or the Doc ID of the document.